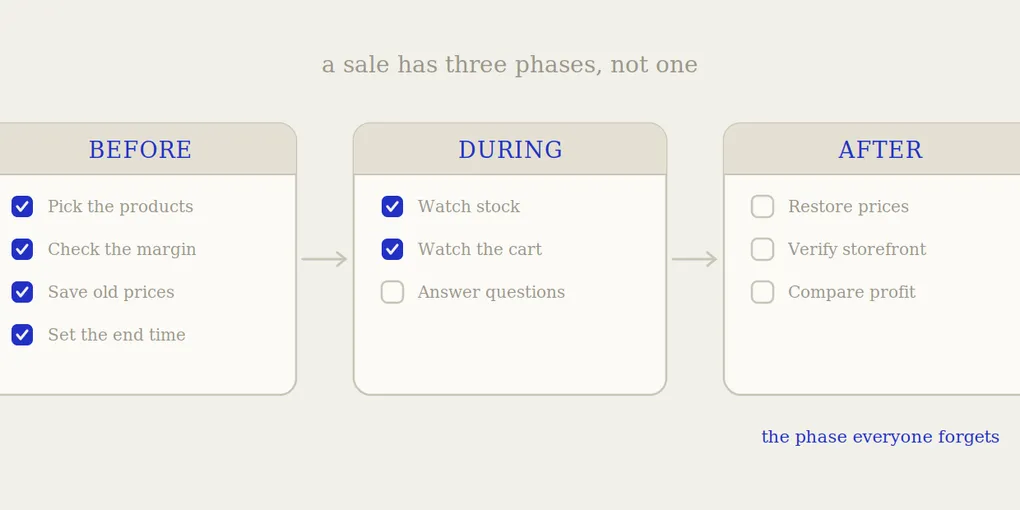
The complete Shopify sale checklist: before, during and after
Search for a Shopify sale checklist and you will find a dozen of them. Almost all cover the same ground: pick your products, set your discount, write your emails, launch. Then they stop.
That is the wrong shape. A sale is not an event you launch, it is a window you open and close. The launch is the easy half. The close is where the money is made or lost, and it is the half nobody writes about, because nothing goes visibly wrong when you get it wrong.
This checklist covers all three phases. Work through it in order.
Before: the decisions that cannot be fixed later
1. Set a goal you can measure
“Increase sales” is not a goal, because a sale always increases sales. Pick one:
- Clear specific overstock (measure: units remaining)
- Acquire new customers (measure: first-time buyers)
- Defend against a competitor’s promotion (measure: your usual conversion rate held)
- Generate cash quickly (measure: cash collected, accepting a margin hit knowingly)
The goal decides which products you discount and how deeply. Skipping it is how people end up discounting their bestsellers for no reason.
2. Check the margin on each product, not the average
Your store average margin is irrelevant here. What matters is the margin on the specific items you are about to discount.
A 30% discount on a product with 30% margin leaves you nothing. A 30% discount on a product with 60% margin still leaves you 30 points to work with. Same discount, completely different outcomes.
We laid out the full break-even arithmetic per margin band in how to run a flash sale without losing margin. Read the table before you pick a number.
3. Pick products deliberately
Rules of thumb that hold across most stores:
- Discount high-margin items, where there is room to give.
- Discount slow movers and overstock, where the alternative is a write-off.
- Do not discount bestsellers. They were going to sell anyway. Discounting them means paying for orders you already had, and it is invisible in your analytics because the numbers look great.
- Consider bundles instead of deeper single-item cuts: they protect margin and raise average order value.
4. Choose the discount mechanism
Shopify offers two, and they behave differently. A price change shows a struck-through price everywhere and carries into your Google and Meta feeds. A discount code applies only at checkout, but it expires on its own and shows up in your discount reports.
The full comparison is in compare_at_price vs discount codes. Short version: use a price change when the sale needs to be seen, a discount code when it needs to be targeted or measured.
5. Record every original price before you change anything
This is the step that costs money when skipped, and it is skipped constantly because it feels like paperwork at the exact moment you are excited to launch.
Export the affected variants, or take a proper record. Not a screenshot, not memory. If you discount forty variants across eight products, you will not reconstruct those numbers correctly three weeks later, and the ones you get wrong will be wrong permanently.
6. Decide the exact end date and time now
Not “next weekend”. A date and a time, decided while you have full context. And decide it before the sale starts, not during, because the version of you who is mid-sale has less information and less attention than the version of you setting it up.
More on why up-front scheduling beats after-the-fact cleanup in how to schedule a sale in advance on Shopify.
7. Check stock against the discount
A deep discount on an item with eleven units in stock produces eleven sales and a lot of disappointed traffic. Either raise the stock, lower the discount, or pick a different product.
8. Verify shipping and thresholds still work
A sale pushes carts across your free-shipping threshold that would not otherwise reach it. If the threshold was set against full-price orders, you are now paying shipping on discounted carts. Check the number still makes sense at sale prices.
9. Prepare the announcement, with an explicit deadline
“Ends Sunday 11pm” outperforms “this weekend only”. A deadline creates urgency; a period creates procrastination. Whatever you write in the announcement must match the end time you actually configured, to the hour.
During: keep it light
The sale is running. There is much less to do here than people expect, and doing too much is its own risk.
10. Check the storefront yourself on day one
Not the admin. The actual product pages, on a phone, logged out. Confirm the struck-through prices show, the badges appear, and the discount applies in a real cart.
11. Watch stock daily on discounted items
Selling out mid-window is the most common operational failure of a sale. Decide in advance what you do when it happens: pull the product, or let it show as sold out.
12. Do not extend it
Extending a sale that is performing feels obviously correct and is almost always wrong. It teaches your customers that your deadlines are soft, which permanently weakens every future promotion you run. It also means the customers who bought early, at your urging, paid the same price as those who waited. Let it end when you said.
13. Do not deepen it mid-window
Same reasoning. Anyone who bought on day one at 20% off and sees 40% off on day three will ask for the difference, and they will be right to.
After: the phase that decides the outcome
This is where sales quietly go wrong, and where almost no checklist goes.
14. Restore every price, on time
Shopify schedules discount codes for you. It does not schedule price changes. If you ran the sale by changing prices, nothing in the platform puts them back. The sale ends when you personally restore every variant you touched.
Which means the sale does not really end on Sunday at 11pm. It ends whenever you next sit down and do the work. A 72-hour sale that stays live for nine days is not a 72-hour sale, and every calculation you did in phase one is void.
We covered this failure mode and how to recover from it in why your Shopify discount didn’t end on time, and the mechanics of restoring prices reliably in how to automatically revert prices after a sale.
15. Verify on the storefront, not in the admin
Restoration failures are partial far more often than they are total. Thirty-eight variants go back and two do not, because you missed a product with variants collapsed in the list, or because a bulk edit silently skipped a row.
Open the storefront. Check the actual pages. The two you missed are the two that will keep selling below cost for months.
16. Confirm no Sale badges are left behind
A leftover compare_at_price on a restored product shows a struck-through price against an identical current price, or a Sale badge on a full-price item. It looks broken, and it trains repeat visitors to distrust your pricing.
17. Compare profit, not revenue
Revenue always rises during a sale. That number tells you nothing.
Take the sale period, compute revenue minus cost of goods, minus payment fees, minus shipping. Compare it against an equivalent normal period. If the answer is lower, the sale cost you money regardless of how good the order count looked.
18. Write down what you would change
Which products sold, which did not, whether the discount was deeper than it needed to be, whether the window was too long. Three lines in a note. The next sale is much easier if you are not starting from zero.
The short version
If you only keep three items from this list, keep these:
- Know your margin per product before choosing a discount.
- Record the original prices before changing anything.
- Make the ending automatic, so it does not depend on you being available.
The first two are judgement. The third is infrastructure, and it is the one most stores never solve.
Where Boomr fits in
Items 5, 6, 14 and 15 are the operational spine of this list, and they are all in the “after” column that nothing in Shopify handles for you.
Boomr: Sale Scheduler covers them. You pick the products, set the discount, set the exact end time. Every original price is stored before anything changes. When the window closes, prices go back on their own, to the exact values they had before, whether or not you are at your desk.
The rest of this checklist is judgement you have to exercise yourself. The ending is the part worth automating.